
In SecturaFAB you can assign 2D milling tools to CAD part geometry within our existing edit part window. You can only apply tools within the part edit window if you have a machine selected that is connected to your milling operation code (op_mill). Let’s discover how.
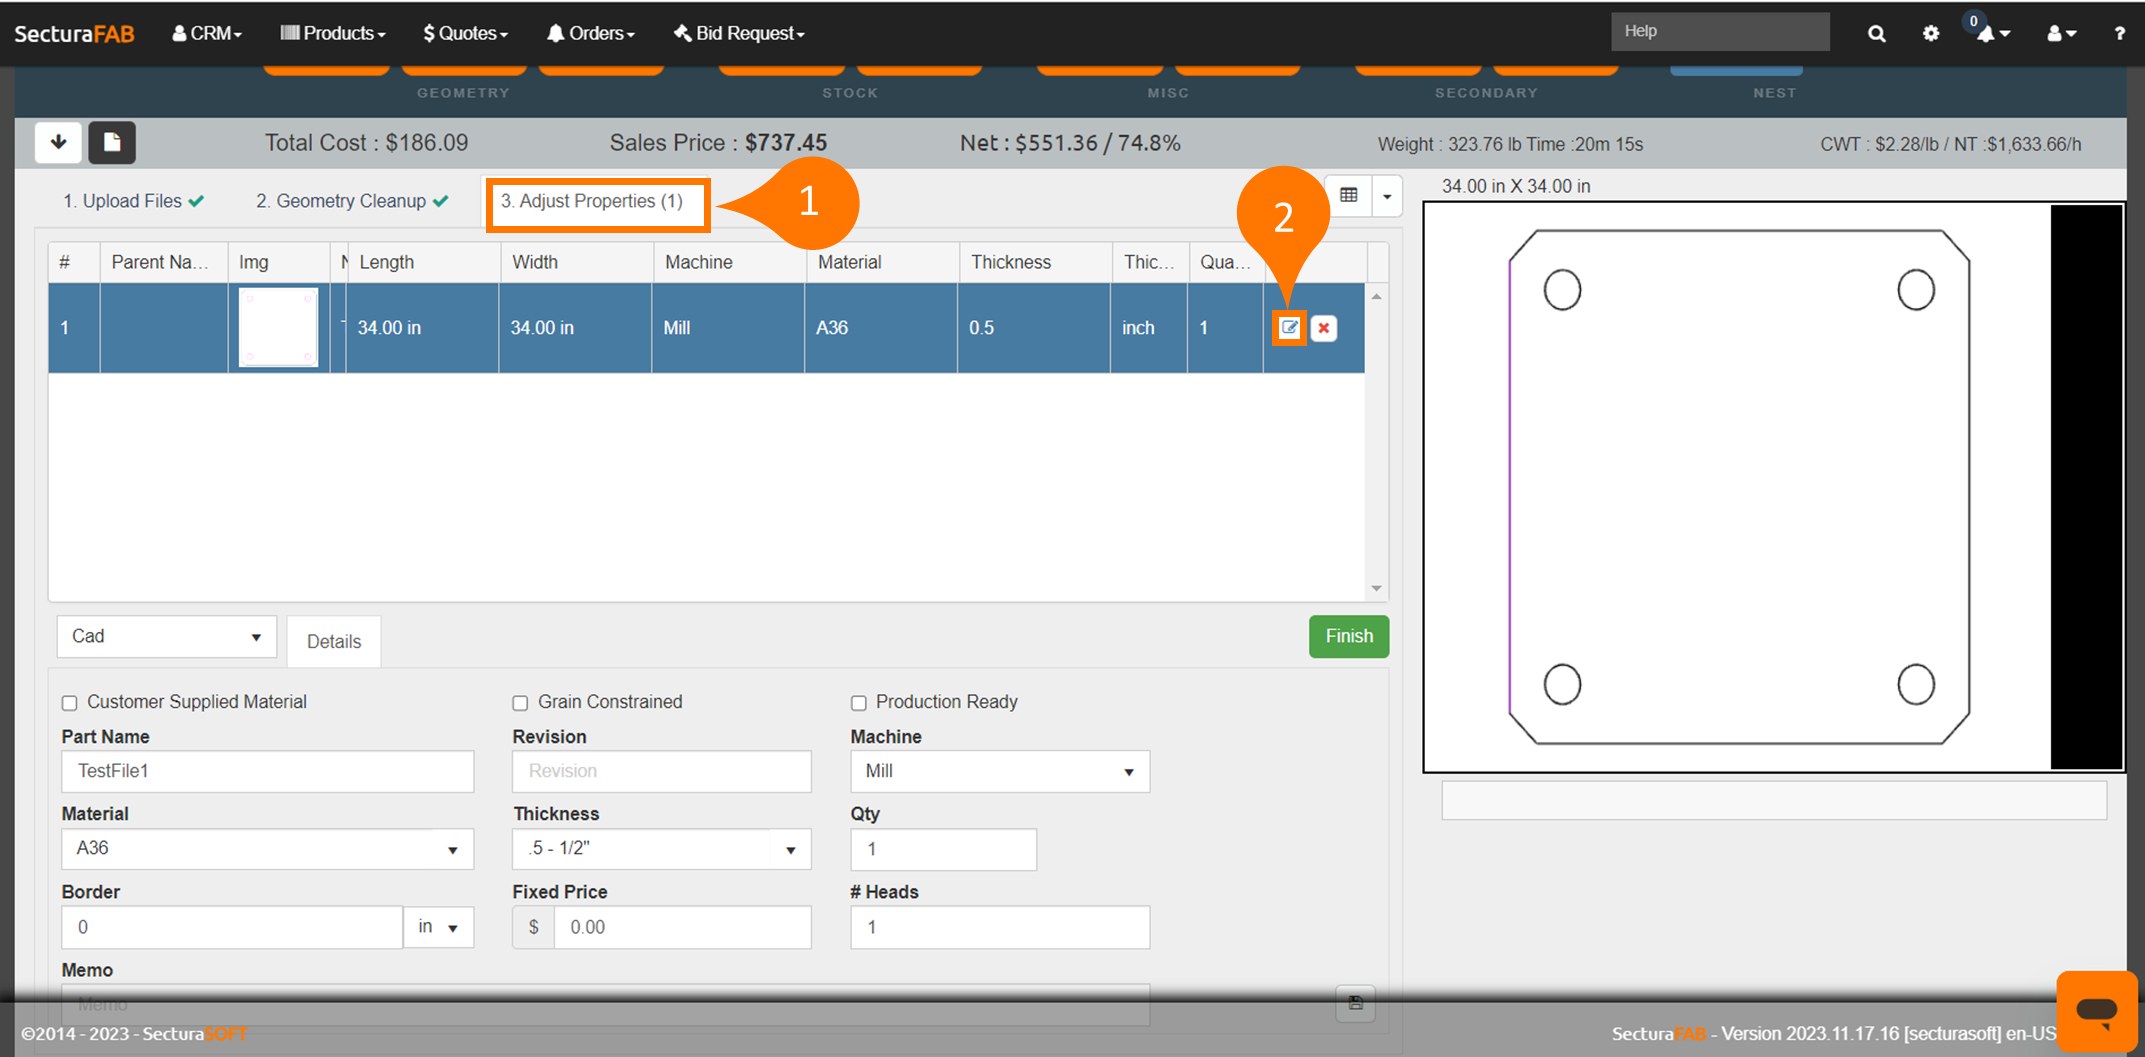
1. From the “Adjust Properties” tab after importing a CAD File, select “Edit Part."
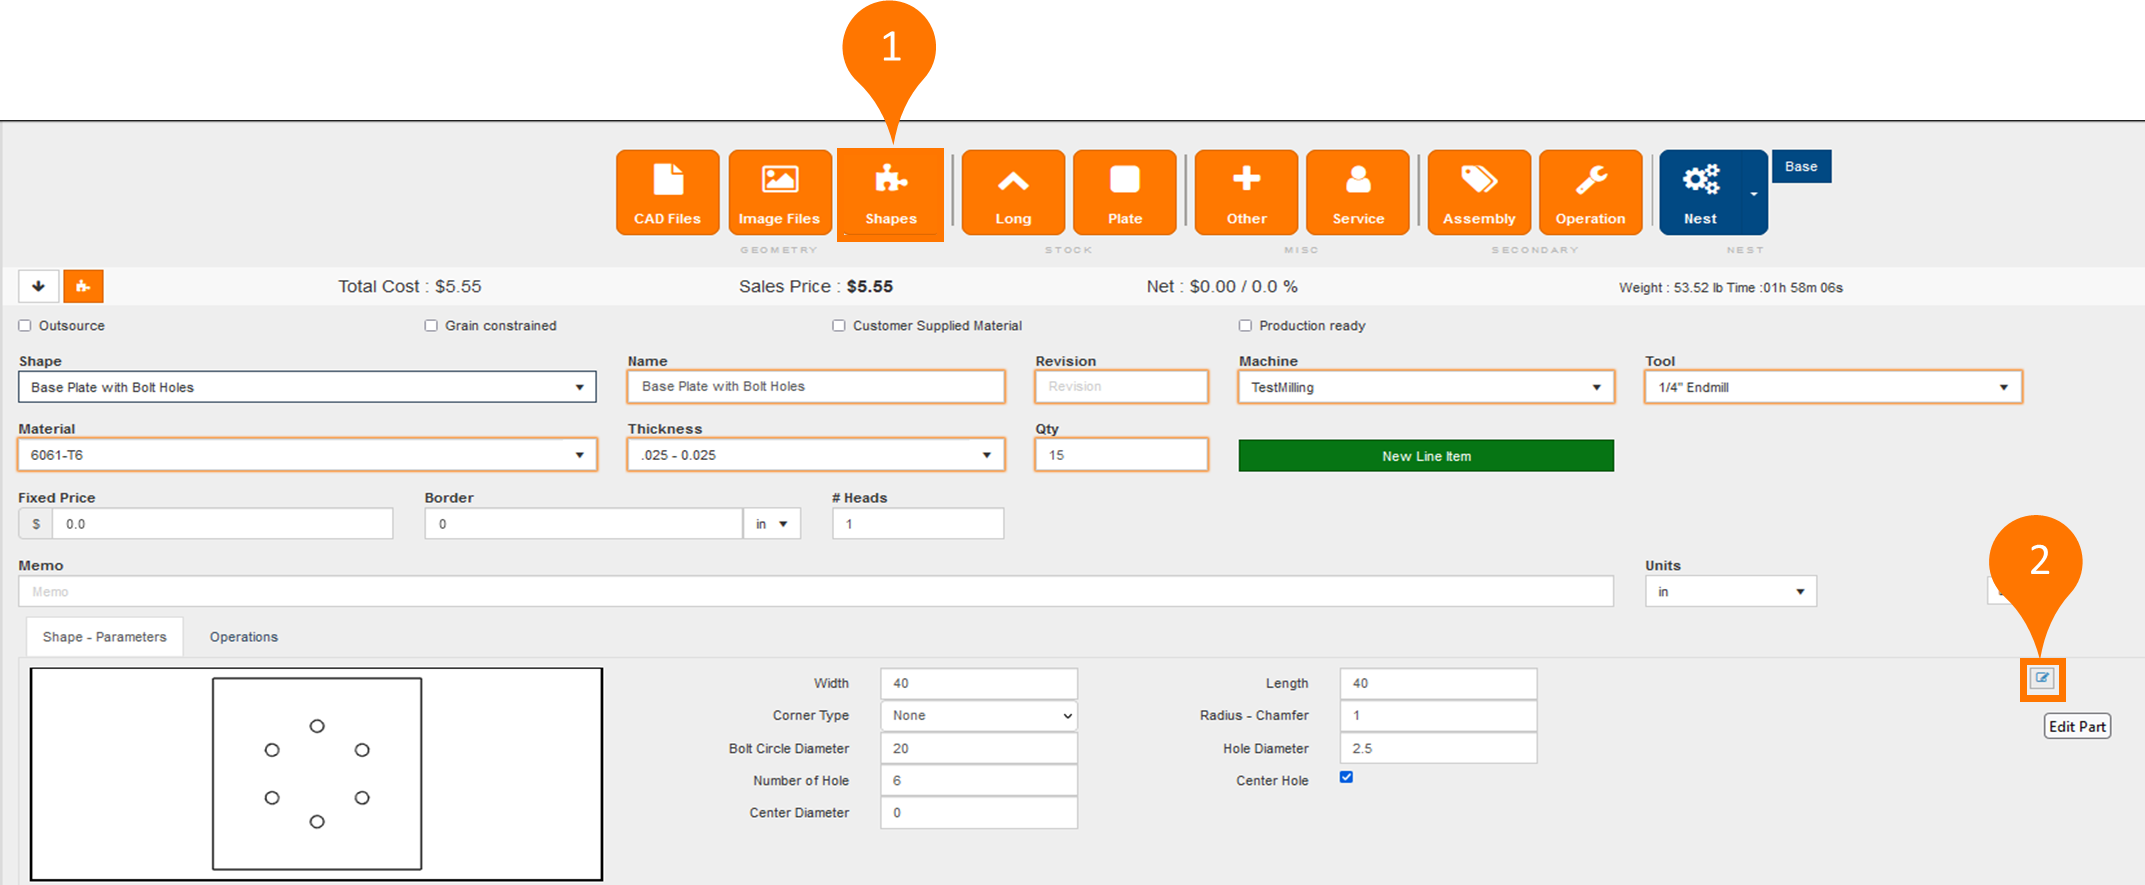
Alternatively, you can select “Edit Part” when quoting a shape.
Once inside the "Edit Part" window you can select geometry to assign tools to. Follow these steps:
- Single click, click drag window, or use Ctrl + Click to select entities.
- Select the tool dropdown and select your tool.
- Click the + next to the tool.
- The geometry changes color when the change is applied.
The tool list displays all tools in your tool file regardless of their usage. Only select a tool that is appropriate for the geometry you are applying it to. For example, you would not apply a drilling tool to a line or an arc. For more information on understanding tool types, check out our related article.
Related to