
What type of files are you working with? DXF? DWG? PDF’s? These files usually require geometry cleanup to ensure the accuracy of the quote. Discover how SecturaFAB combines the upload process with geometry cleanup to streamline your quoting process.
First, familiarize yourself with the upload process. Start by watching an overview of how to upload and edit a DXF or how to upload and edit a PDF in our resource center. If you are already familiar with the upload process continue with this guide.
After uploading files, complete geometry cleanup. (STEP files do not require cleanup.)
- Files needing geometry cleanup will display an orange triangle indicator.
- Begin geometry cleanup with the remove or detect actions.
- When layers are available deselect them to speed up the cleanup.
- Use “Convert To” to change the measuring units to metric or imperial.
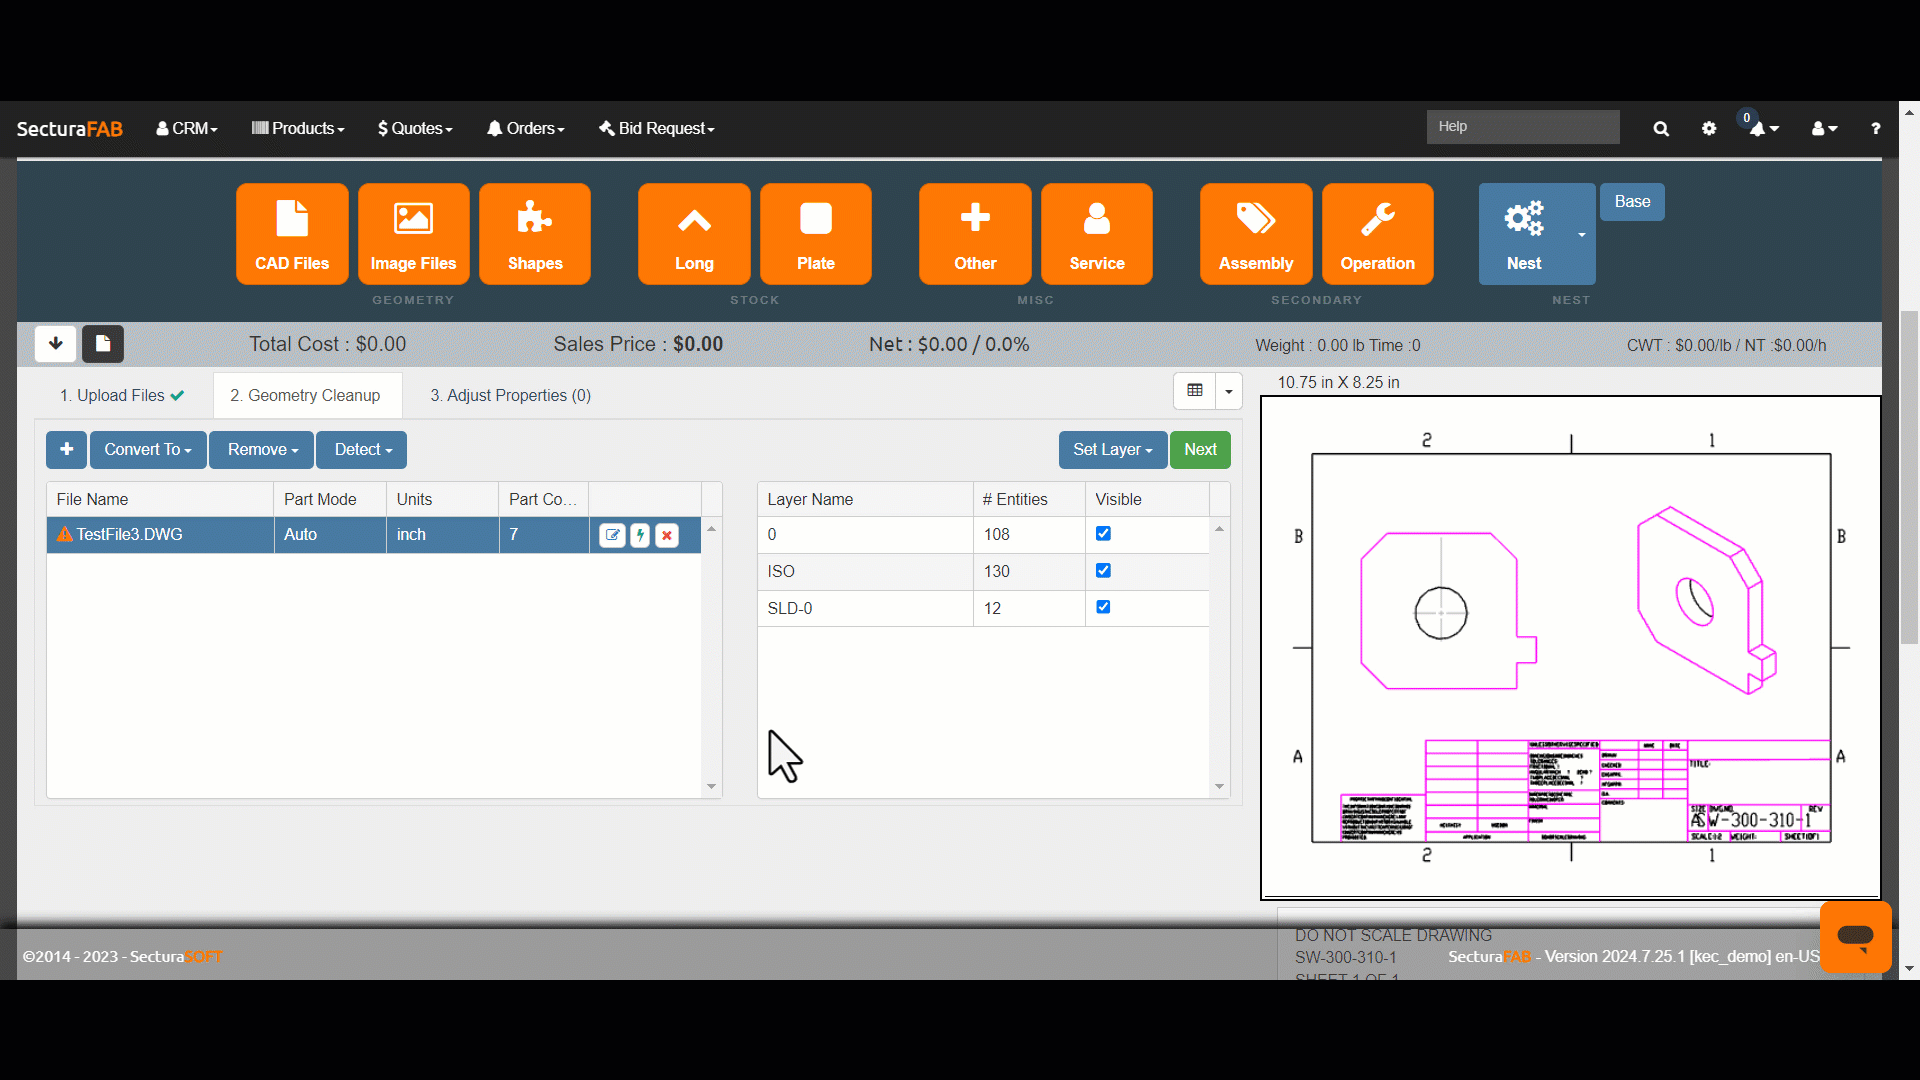
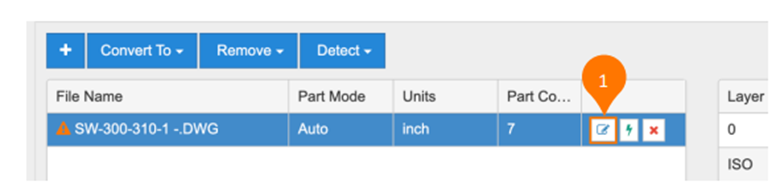
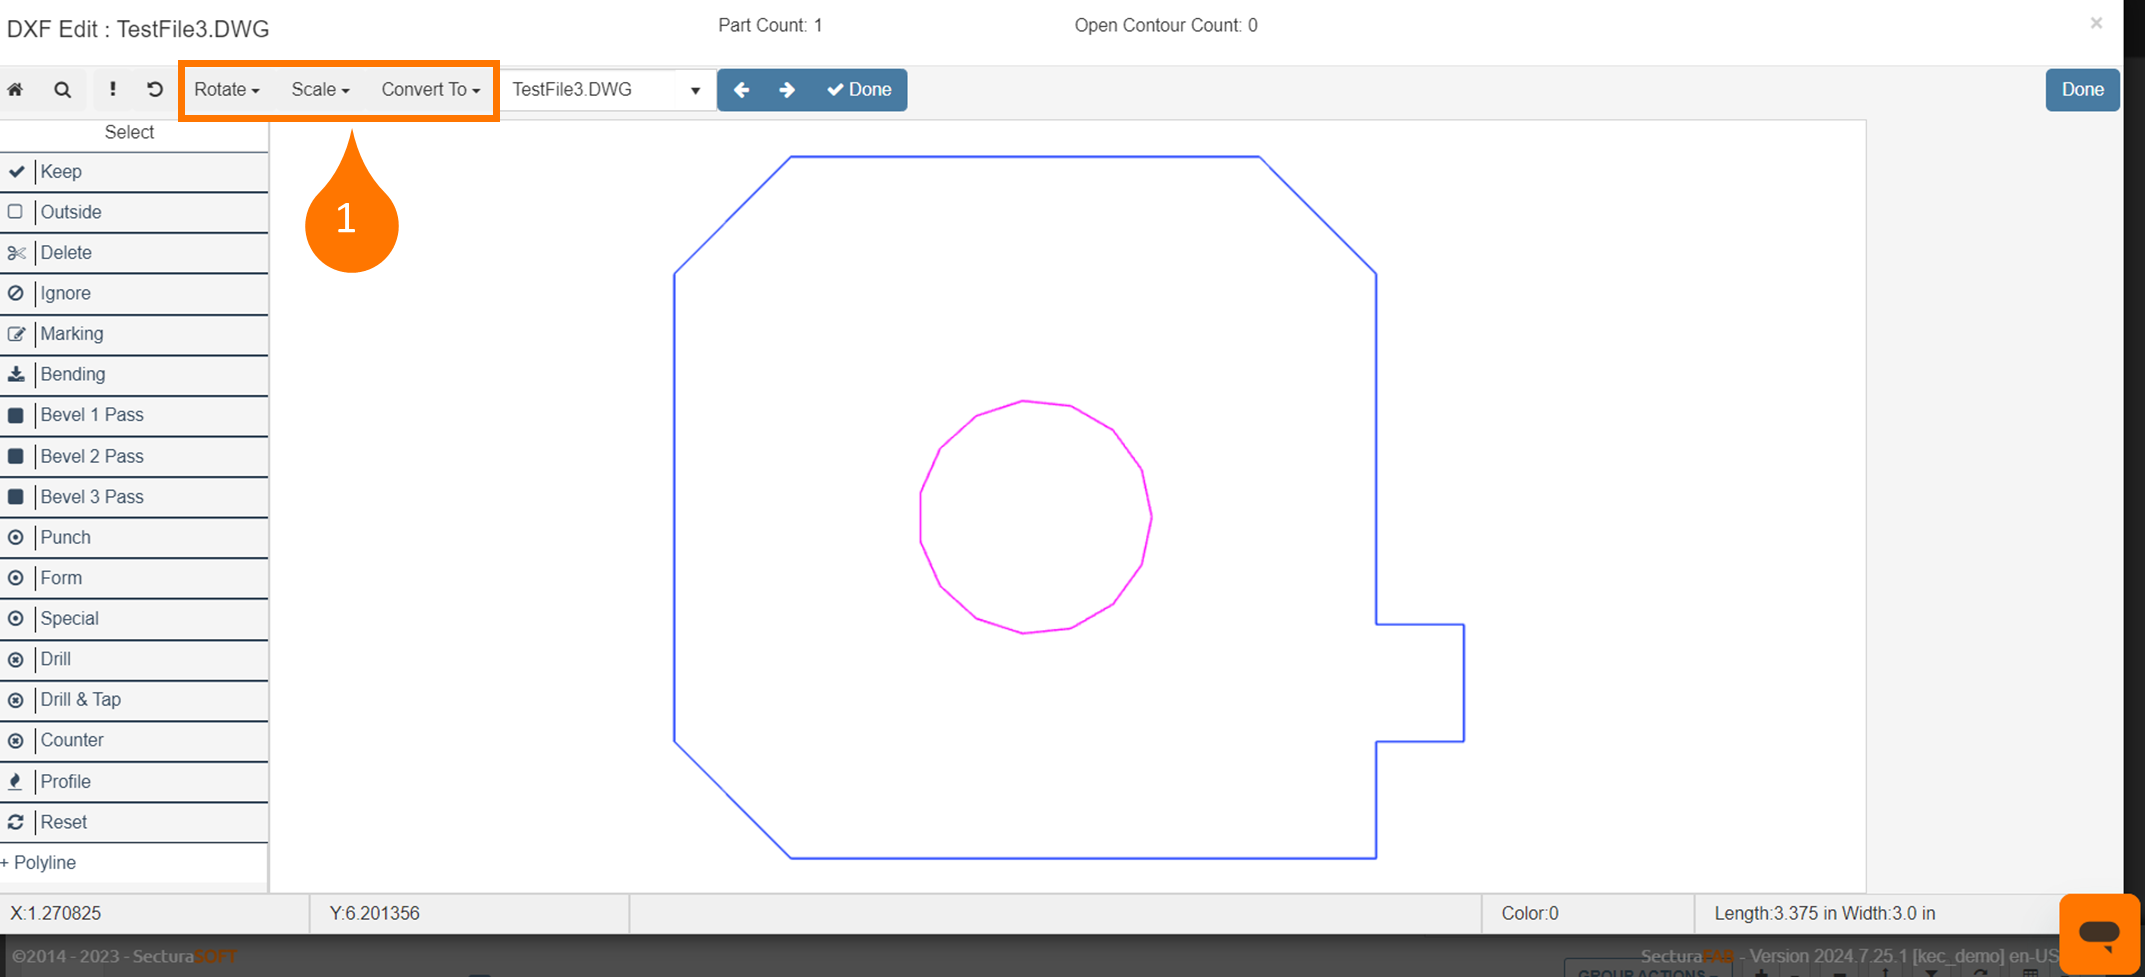
Let's explore the advanced options. Select “Edit DXF”
Within the Edit DXF screen this may be familiar to most of you. The functionality in this window is typical of any CAD software however there are a few tips and tricks to SecturaFAB. Let’s review the options:
- Rotate: Rotate the part by an angle degree or by a minimum rectangle amount.
- Scale: Scale the part by overall measurements or by a specific length or width.
- Convert To: Convert the parts to inches or millimeters.
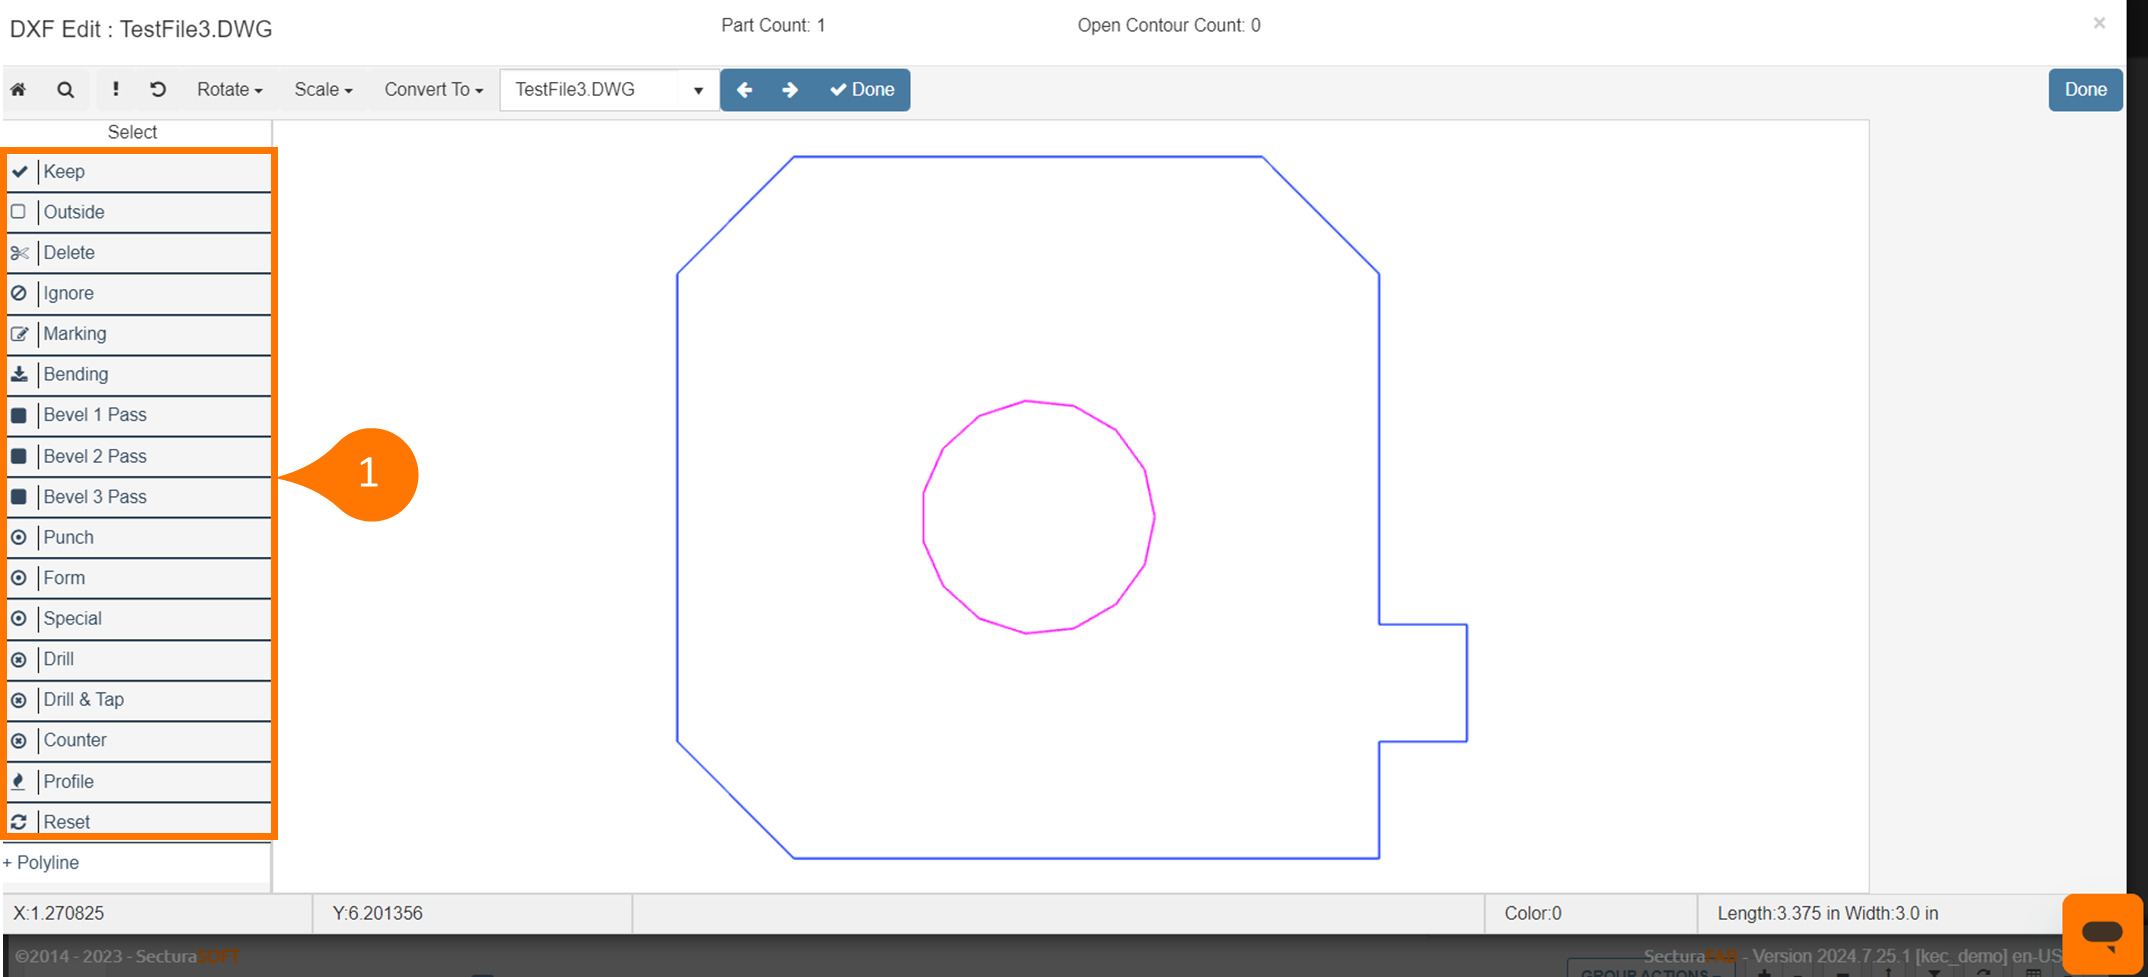
Use the command list to adjust the part or add operations when applicable. Let’s go through the list and their functions:
| Term | Function | Color |
| Keep |
Any selected contours will be kept; all others will be removed.
|
N/A |
| Outside |
Distinguish the outside of the part for clarity on what needs to be cut.
|
Light Green |
| Delete |
Remove any selected contours from the part.
|
N/A |
| Ignore |
The contour is not removed however it is ignored from calculating the cost and time.
|
Gray |
| Marking |
When text is added to a part, marking allows you to note it.
|
Orange |
| Bending |
Add a bending operation to the part when applicable.
|
Green |
| Bevel 1 Pass |
Add where the first bevel pass is needed to smooth an edge.
|
Teal |
| Bevel 2 Pass |
Add where the second bevel pass is needed to smooth an edge.
|
Dark Teal |
| Bevel 3 Pass |
Add where the third bevel pass is needed to smooth an edge.
|
Dark Teal |
| Punch |
A tooling callout for your punch or drilling/milling operations.
|
Purple |
| Form |
A tooling callout for your form operations.
|
Dark Green |
| Drill |
A tooling callout for your punch or drilling/milling operations.
|
Purple |
| Drill and Tap |
A tooling callout for your punch or drilling/milling operations.
|
Purple |
| Counter |
A tooling callout for your counter sink.
|
Purple |
| Profile |
Add a profile operation to the part.
|
Blue |
| Reset |
Reset what was done to the part.
|
N/A |
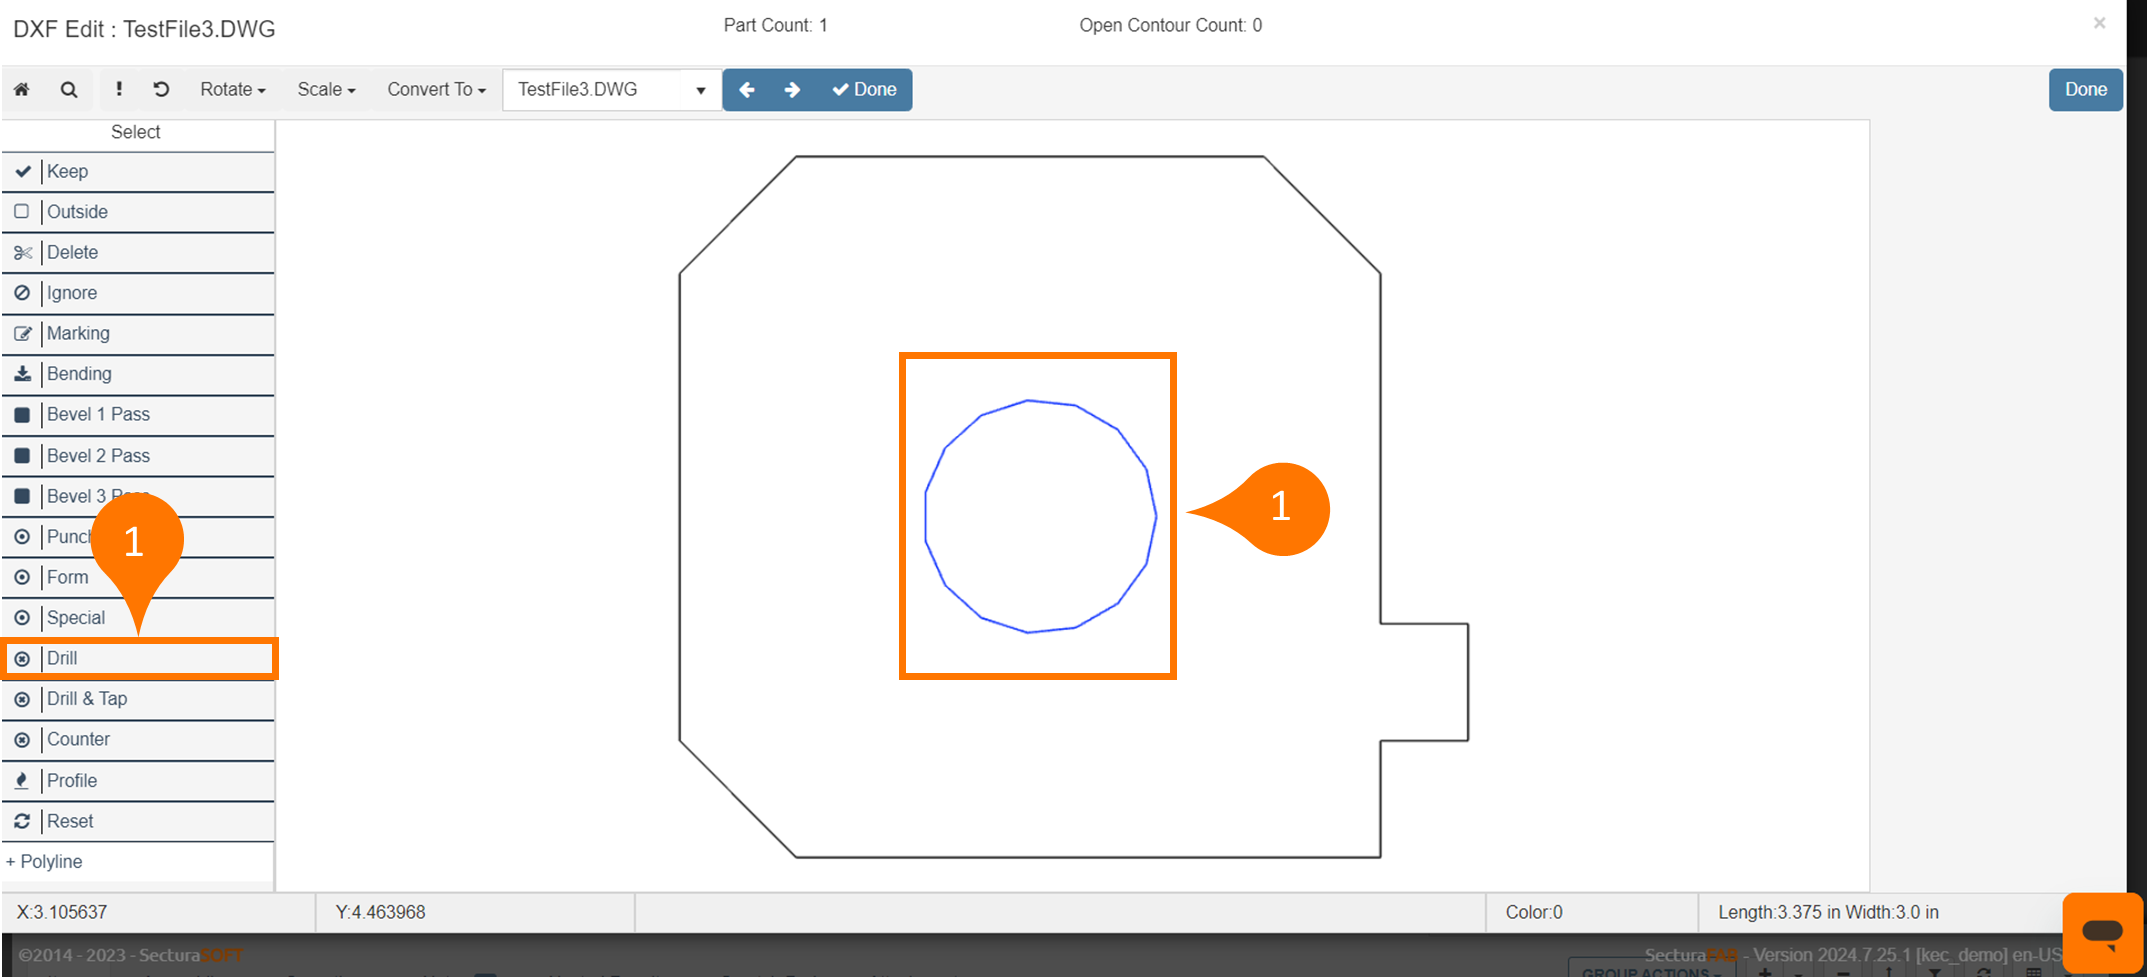
Let’s add a drill to the hole. Select the hole (notice the color change to blue when selected) then choose “Drill.”
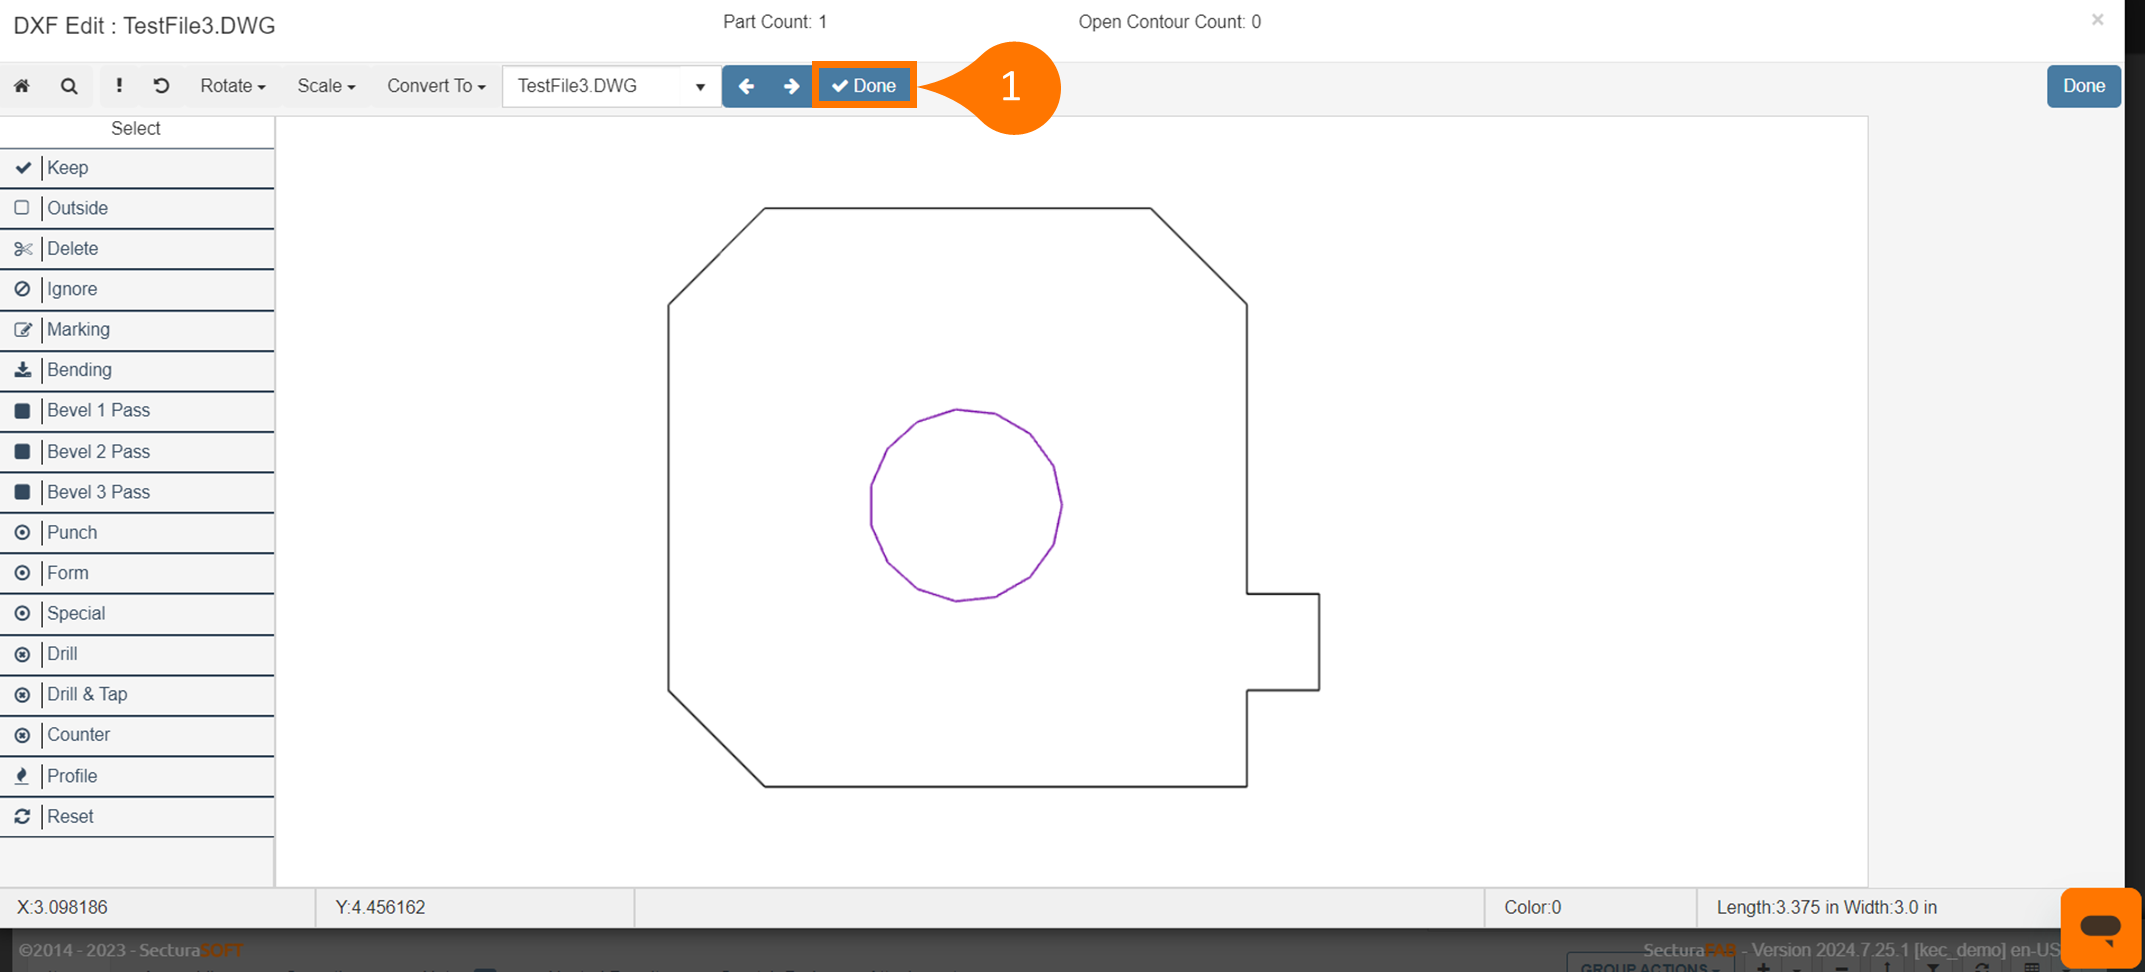
Once the operation is applied, notice the color change (purple). Select “Done” to save.
Now, let’s edit a file with multiple parts. From the “Edit DXF” window we will be using “Keep” to remove any unwanted pieces. Begin by selecting the parts you need to keep, then select “Keep.”
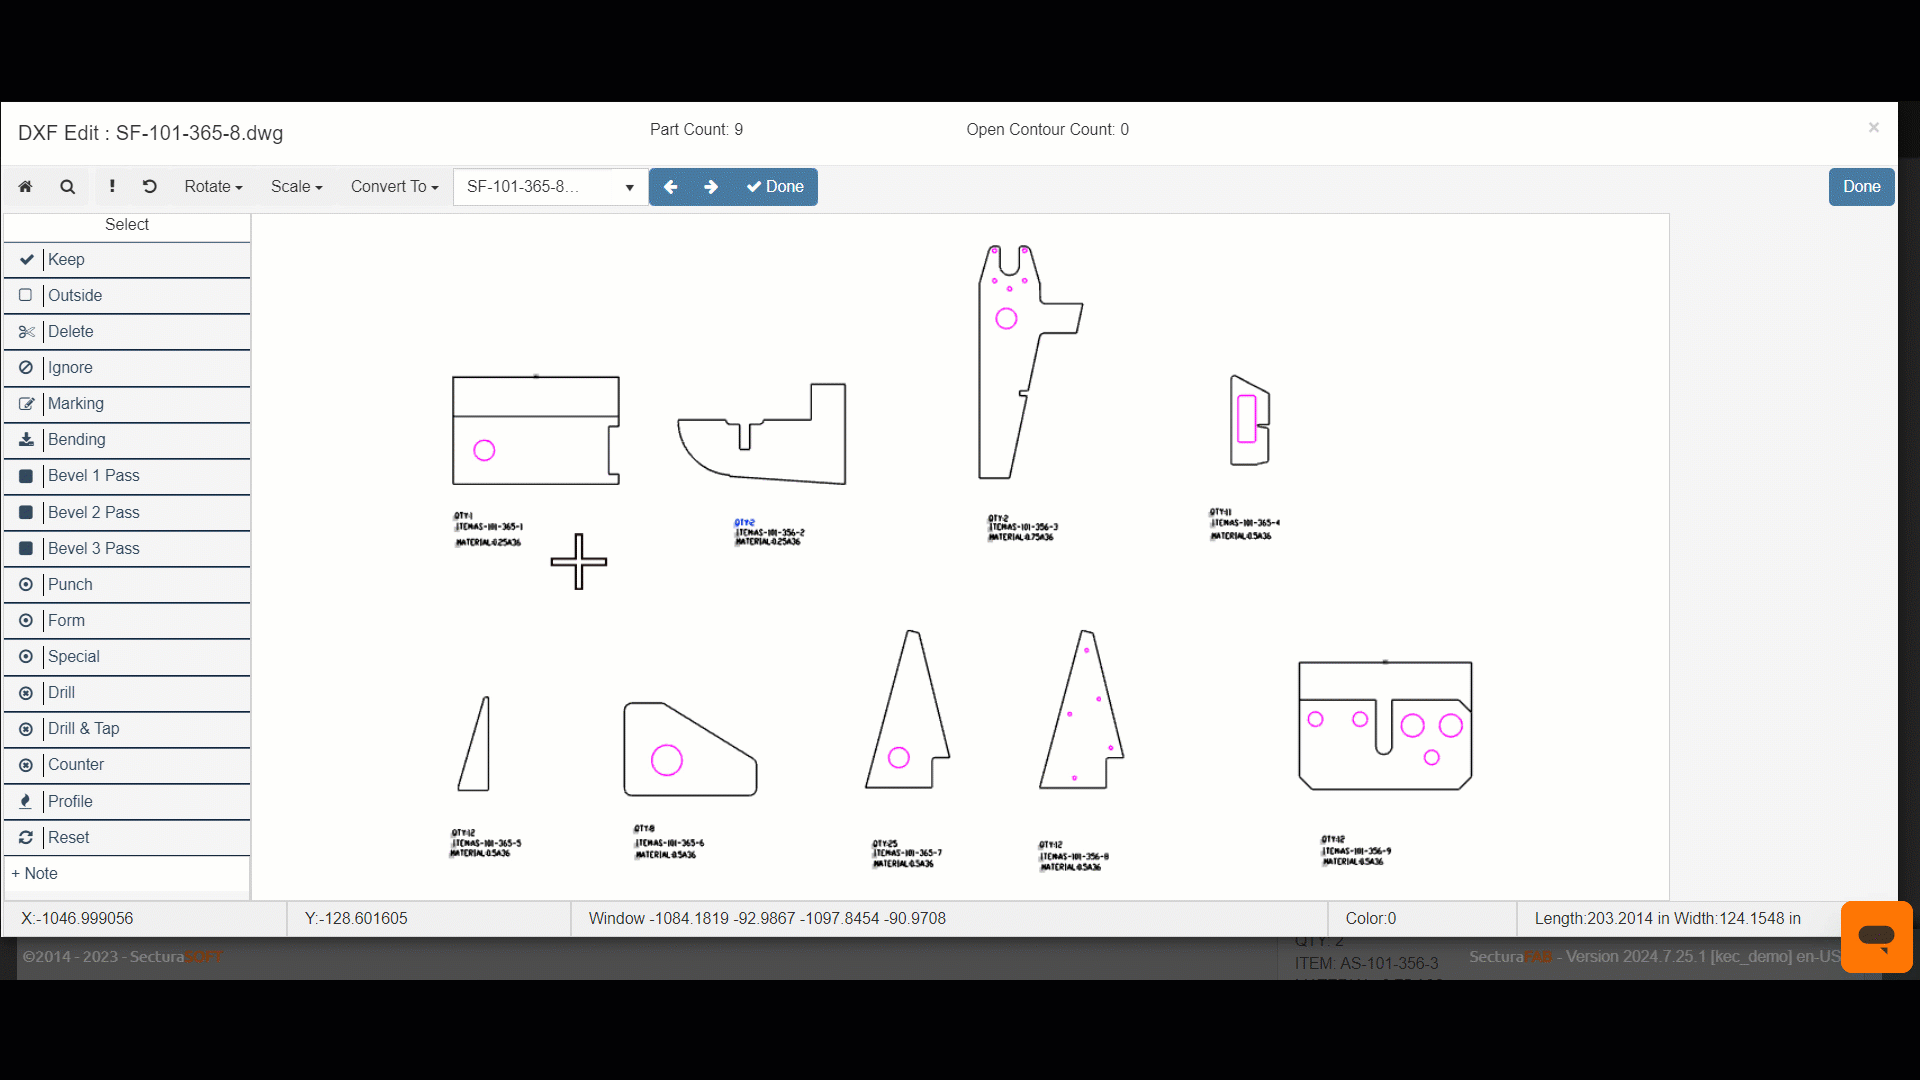
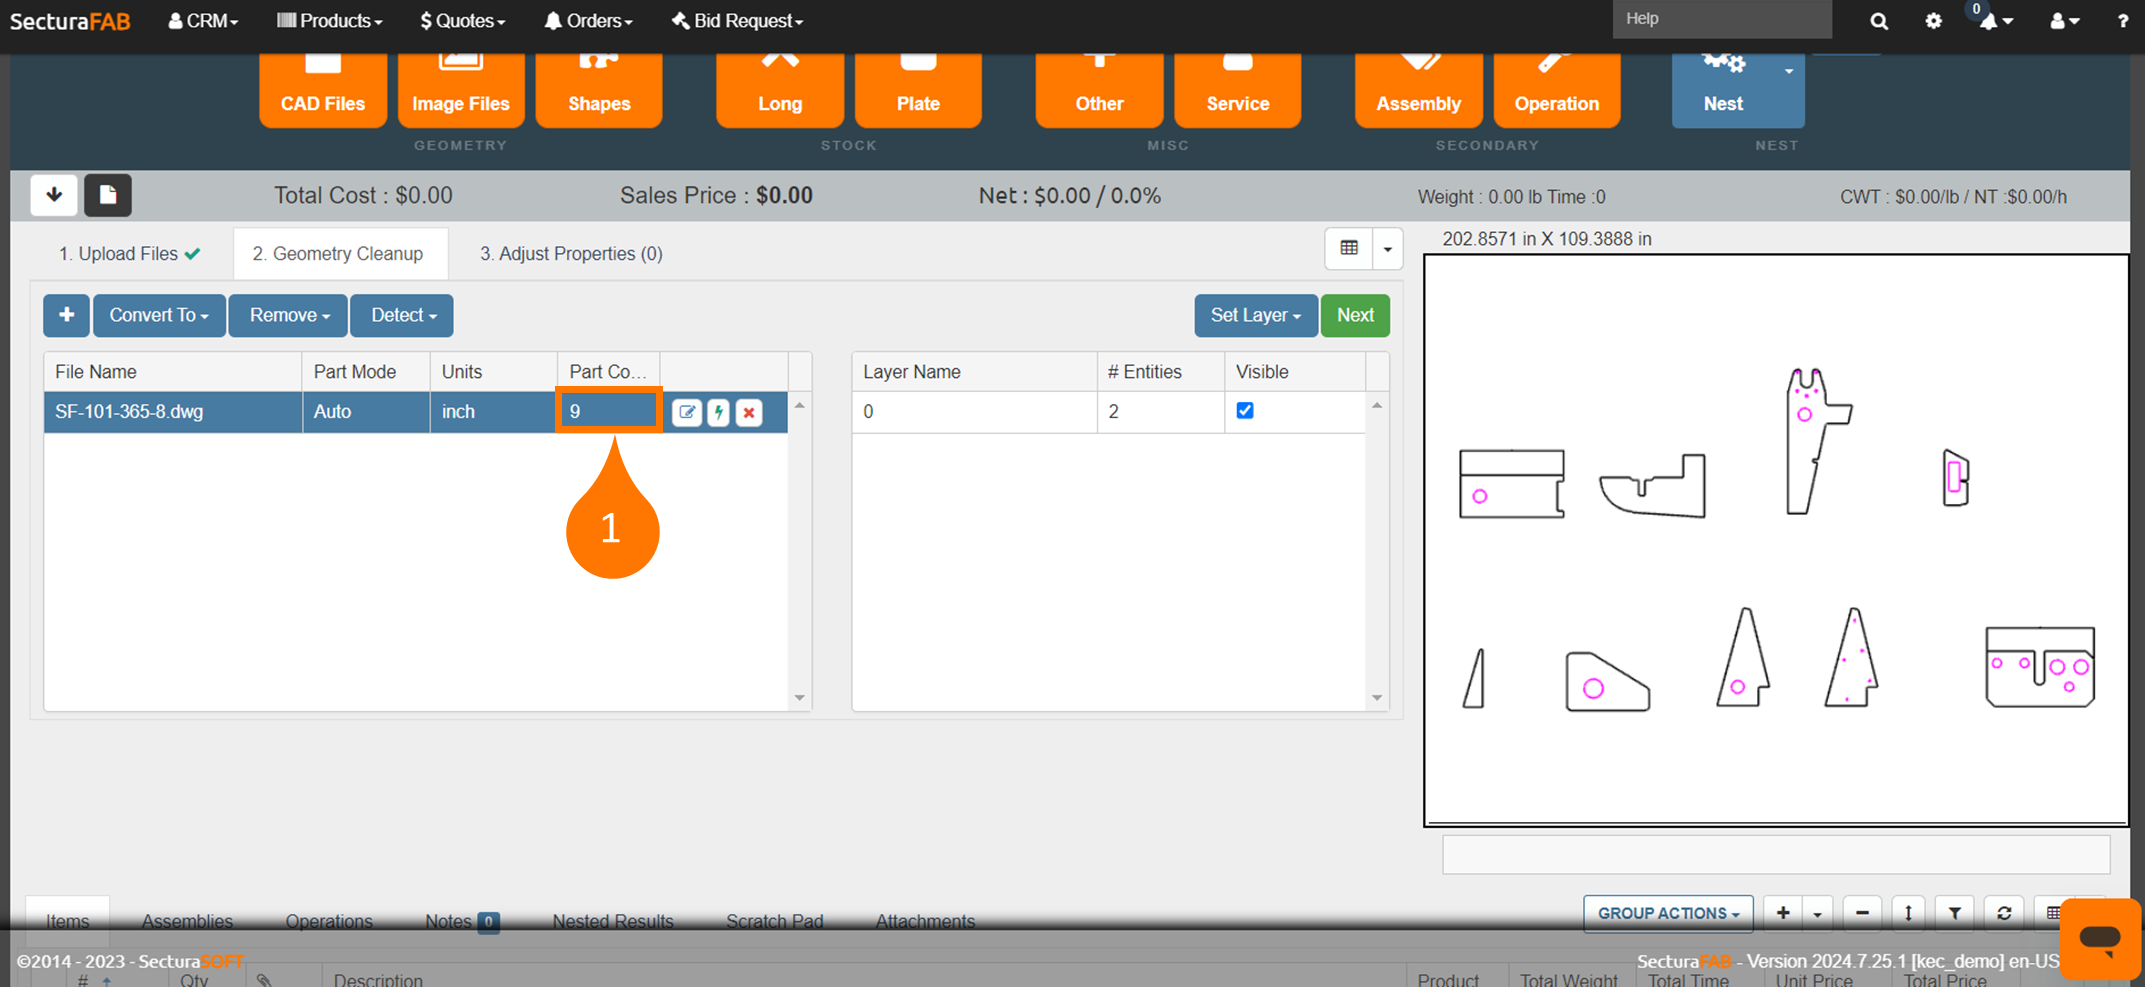
Double-check the part count to ensure all the parts have been identified and move on to adjust properties. For this example, our part count is nine.
Congratulations, you learned about how geometry cleanup can speed up your quoting process. The next step is adjusting properties, learn more about this in our resource center.